Color Mode
Astute reader "JC" was reading the last post, specifically this part of it:
And he asked, "Where is the 'color mode'? Where is the 'brightness/ contrast setting'?"
To which I say, "ah, you n00bs -- youy keep this blog alive. I thank God for you." Let's start with the image which I manipulated, which is this one:
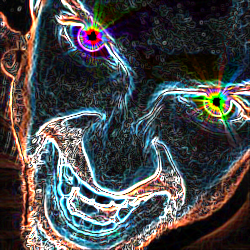
The first thing we're going to do is open up the "Image" menu, thus:
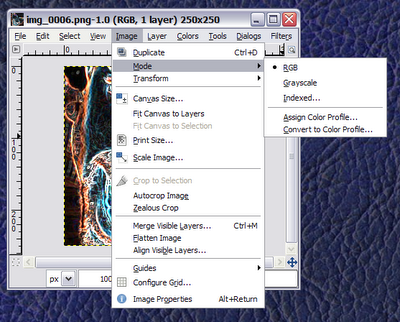
Image -> Mode opens up an extra menu which lists the three major color modes -- and to preserve your actual interest in this tutorial, we are going to not think about "Indexed" color mode right now. But you can see in the image I dropped in here that there is a "grayscale" mode. "Grayscale" means "not in regular color but in shades of gray". We're going to comvert this image to grayscale, thus:
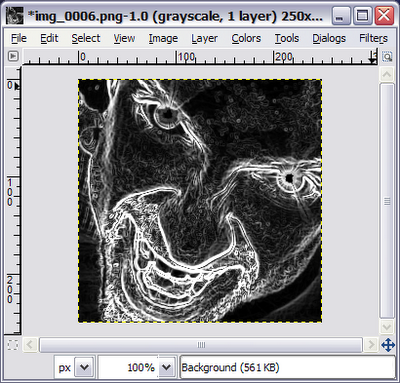
So this image looks like a line drawing (a little), but the lines are white and the "paper" is black. What do we do about that? Well, duh, we have to invert the colors -- so go under the "Colors" menu, go down to "Invert", and click.
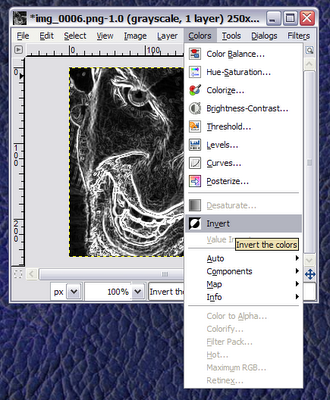
Now we have gray on white, which looks better, but our muitant friend here looks like he has really bad skin. How do we fix that?
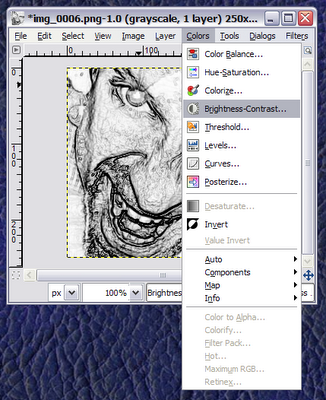
Well, we fix that by altering the contrast and brightness of the image. What we really want in the lightest parts of the image all to essentially go to white, but all the darker lines to go to something closer to black. And we do that right here:
That brings up this dialog:
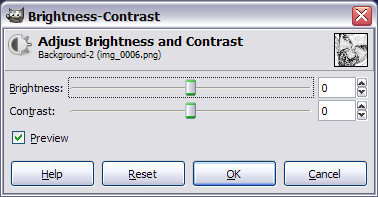
"Brightness" values less than 0 make the whole image fade to gray; "Contract" values less than 0 cause the darker aspects of the image to soften. But raising the "Brightness" to, say, "25", and the "Contrast" ot, say "40" gets you something like this:
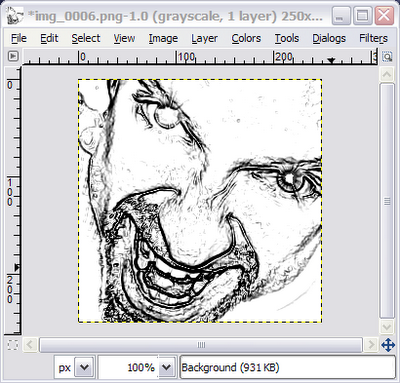
Which is, more or less, what I showed you last time without a lot of explanation.
Does that help, JC?

And he asked, "Where is the 'color mode'? Where is the 'brightness/ contrast setting'?"
To which I say, "ah, you n00bs -- youy keep this blog alive. I thank God for you." Let's start with the image which I manipulated, which is this one:

The first thing we're going to do is open up the "Image" menu, thus:

Image -> Mode opens up an extra menu which lists the three major color modes -- and to preserve your actual interest in this tutorial, we are going to not think about "Indexed" color mode right now. But you can see in the image I dropped in here that there is a "grayscale" mode. "Grayscale" means "not in regular color but in shades of gray". We're going to comvert this image to grayscale, thus:

So this image looks like a line drawing (a little), but the lines are white and the "paper" is black. What do we do about that? Well, duh, we have to invert the colors -- so go under the "Colors" menu, go down to "Invert", and click.

Now we have gray on white, which looks better, but our muitant friend here looks like he has really bad skin. How do we fix that?
Well, we fix that by altering the contrast and brightness of the image. What we really want in the lightest parts of the image all to essentially go to white, but all the darker lines to go to something closer to black. And we do that right here:

That brings up this dialog:

"Brightness" values less than 0 make the whole image fade to gray; "Contract" values less than 0 cause the darker aspects of the image to soften. But raising the "Brightness" to, say, "25", and the "Contrast" ot, say "40" gets you something like this:

Which is, more or less, what I showed you last time without a lot of explanation.
Does that help, JC?
